Deploying a nodejs application on a cloud server is different from using a PHP app, because nodejs requires binding ports. Meanwhile, when you want to deploy a PHP app, you just upload a PHP script, and the server will automatically run the application.
Node.js is an open-source and cross-platform runtime environment for JavaScript. With Node.js we can run JavaScript code anywhere, not just limited to the browser environment. Node.js runs the V8 JavaScript engine (which is also the core of Google Chrome) outside of the browser. This allows Node.js to have high performance.
The revolutionary development of Nodejs as a server, allows us to create servers very easily, besides being easy, Nodejs is also fast. The Node.js http package gives developers the flexibility to build low-level servers. It's even easy if you have to set the value of the HTTP header field.
Before deploying the application to Heroku, I will share how to create a server with nodejs, this server will only respond to JSON form.Here's how to create a simple nodejs server:
- Create a new project
$ npm init -y
- Installing expressJs package
$ npm install express
- Create app.js file
- Adding start script in package.json
- Running app
$ npm run start
Awesome, the nodejs server application is up and running!
To turn off the server, please click terminal/CLI, then press ctrl+c on the keyboard.
Next is the step to deploy the nodejs application to Heroku.
Heroku is a cloud platform as a service (PaaS) supporting several programming languages. One of the first cloud platforms, Heroku has been in development since June 2007, when it supported only the Ruby programming language, but now supports Java, Node.js, Scala, Clojure, Python, PHP, and Go.
The benefit of using Heroku is that we can deploy the nodejs server without configuring the server, without server maintenance, and only with the CLI the nodejs application can be fully launched on the internet. The most important thing is that heroku is free (limited with additional services).
Here are the steps to deploy the nodejs application on Heroku's server, please read carefully, for this step, I assume you already have me Heroku, if you don't have one, you can register here.
1. Preparing project
- Go to the dashboard and click new button in the top right corner, then select create new.
- Fill in the name of your application, then please click the create new button.
2. Install the Heroku CLI
$ npm install -g heroku
If you haven't already, log in to your Heroku account and follow the prompts to create a new SSH public key.
$ heroku login
3. Create a new Git repository
Initialize a git repository in a new or existing directory
$ git init
$ git checkout -b main
$ heroku git:remote -a nodejs-app-ijal17
4. Deploy your application
Commit your code to the repository and deploy it to Heroku using Git.
$ git add .
$ git commit -m "initial commit"
$ git push heroku main
5. Troubleshooting
Ooops, after opening the application an error occurred, calm down and don't panic, we'll find a solution together.
- Open app.js file, and change port value to process.env.PORT
- Commit and push again.
$ git add .
$ git commit -m "cahange port"
$ git push heroku main
- Test your app (open url).
Tadaaa, congratulation your app now ready!
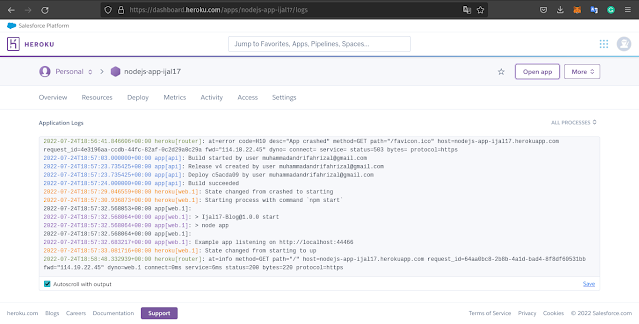
Tips: you can track logs from your nodejs application on Heroku's cloud server by clicking More button in the upper right corner, then select View logs.


