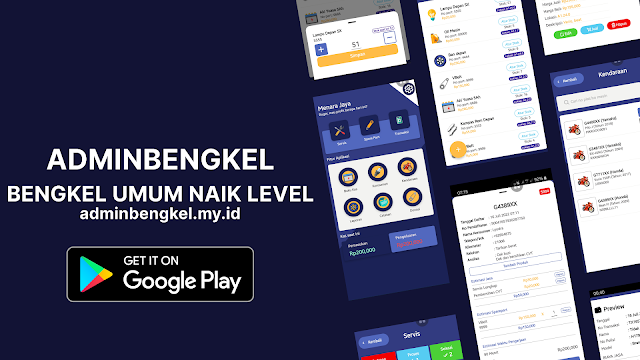
AdminBengkel is an administration application to help motorcycle workshop owners to manage finances, spare parts, and services (Available in Indonesia and Malaysia).
The following is the process of making a workshop administration apps:
1. Perform market analysis for applications
The first step is to analyze the market, and the wishes of the actors who have motorcycle repair shops, to determine the features needed by this app. Luckily I have a professional background as a motorcycle repair technician, so I didn't encounter any difficult problems when doing this step. The point to note at this step is the number of business actors who need app like this, to help with their daily work.
And what I found when doing market analysis, it turns out that many people need an app like this, to help solve problems in the field, such as the absence of a well-organized recording of spare parts, no customer database, and poor cash flow records.
After getting a lot of obstacles felt by motorcycle workshop business actors, I finally found a suitable feature, following a list of features:
- Manage customer database
- Manage vehicle database
- Manage transaction database
- Manage spare part database
- Manage service database
- Manage service registration
- Monitoring the progress of motorcycle repairs
- Make direct sales of services
- Make direct sales of spare parts
- Integration of service and spare parts
- Can be used offline without internet
2. User Interface Design
User interace (UI) serves as an introduction to the appearance of the applications so that the app can be used easily, many tools to create UI such as Figma, Invision, Sketch, Adobe xd, and others. I created an admin workshop app UI using Figma as a design tool and used dribble as inspiration for the design.
With the help of the Figma app, I can easily create a UI of the required features and very quickly. Figma also provides templates made by the community, and there are lots of things that I can use to speed up the design process.
3. Determining the best programming language
Programming language is the core of application development, we can use any programming language to build applications, in this case, I used React Native as a language to develop android applications. Although React Native is basically javascript, it can still be used to create android apps (java).
React Native is a framework for developing multi-platform applications (Web, Android, and iOS). React Native is written in Javascript, and can be rendered with native code according to the platform used, React Native also has a Fast Refresh feature that lets you iterate at lightning speed. No more waiting for native builds to finish. Save, see, repeat.
4. Build Apps
These are the main steps of app creation, here are the details:
Using visual studio code as a code editor, visual studio code is a very powerful code editor, with visual studio code, I can developed a motorcycle workshop app very quickly because of the many plugins I use in the application development process, such as snippets, git, run emulator and many more.
Install app using react-native: use cli/terminal to install
Database configuration: for this motorcycle workshop app to run offline, I use the easy-db library as a database for the application, querying easy-db is very easy as in the example below:
You can also create a helper instance to make it easier to query,
Tips and tricks: to avoid re-installation, I use git branch help to save every code change.
5. Publishing to Google Play Store
This is my final step in building a motorcycle workshop app. For the application to be used by many users, I listed it on Google Play Store, the reason I chose Android as the OS for this app is that most people in Indonesia use Android smartphones.
I published the motorcycle workshop app using the method suggested by the official React Native and Google sites.
Source code: https://github.com/erzetid/AdminBengkel
Hopefully, the article about "The process of building a motorcycle workshop application" is useful, please give suggestions and criticisms.


